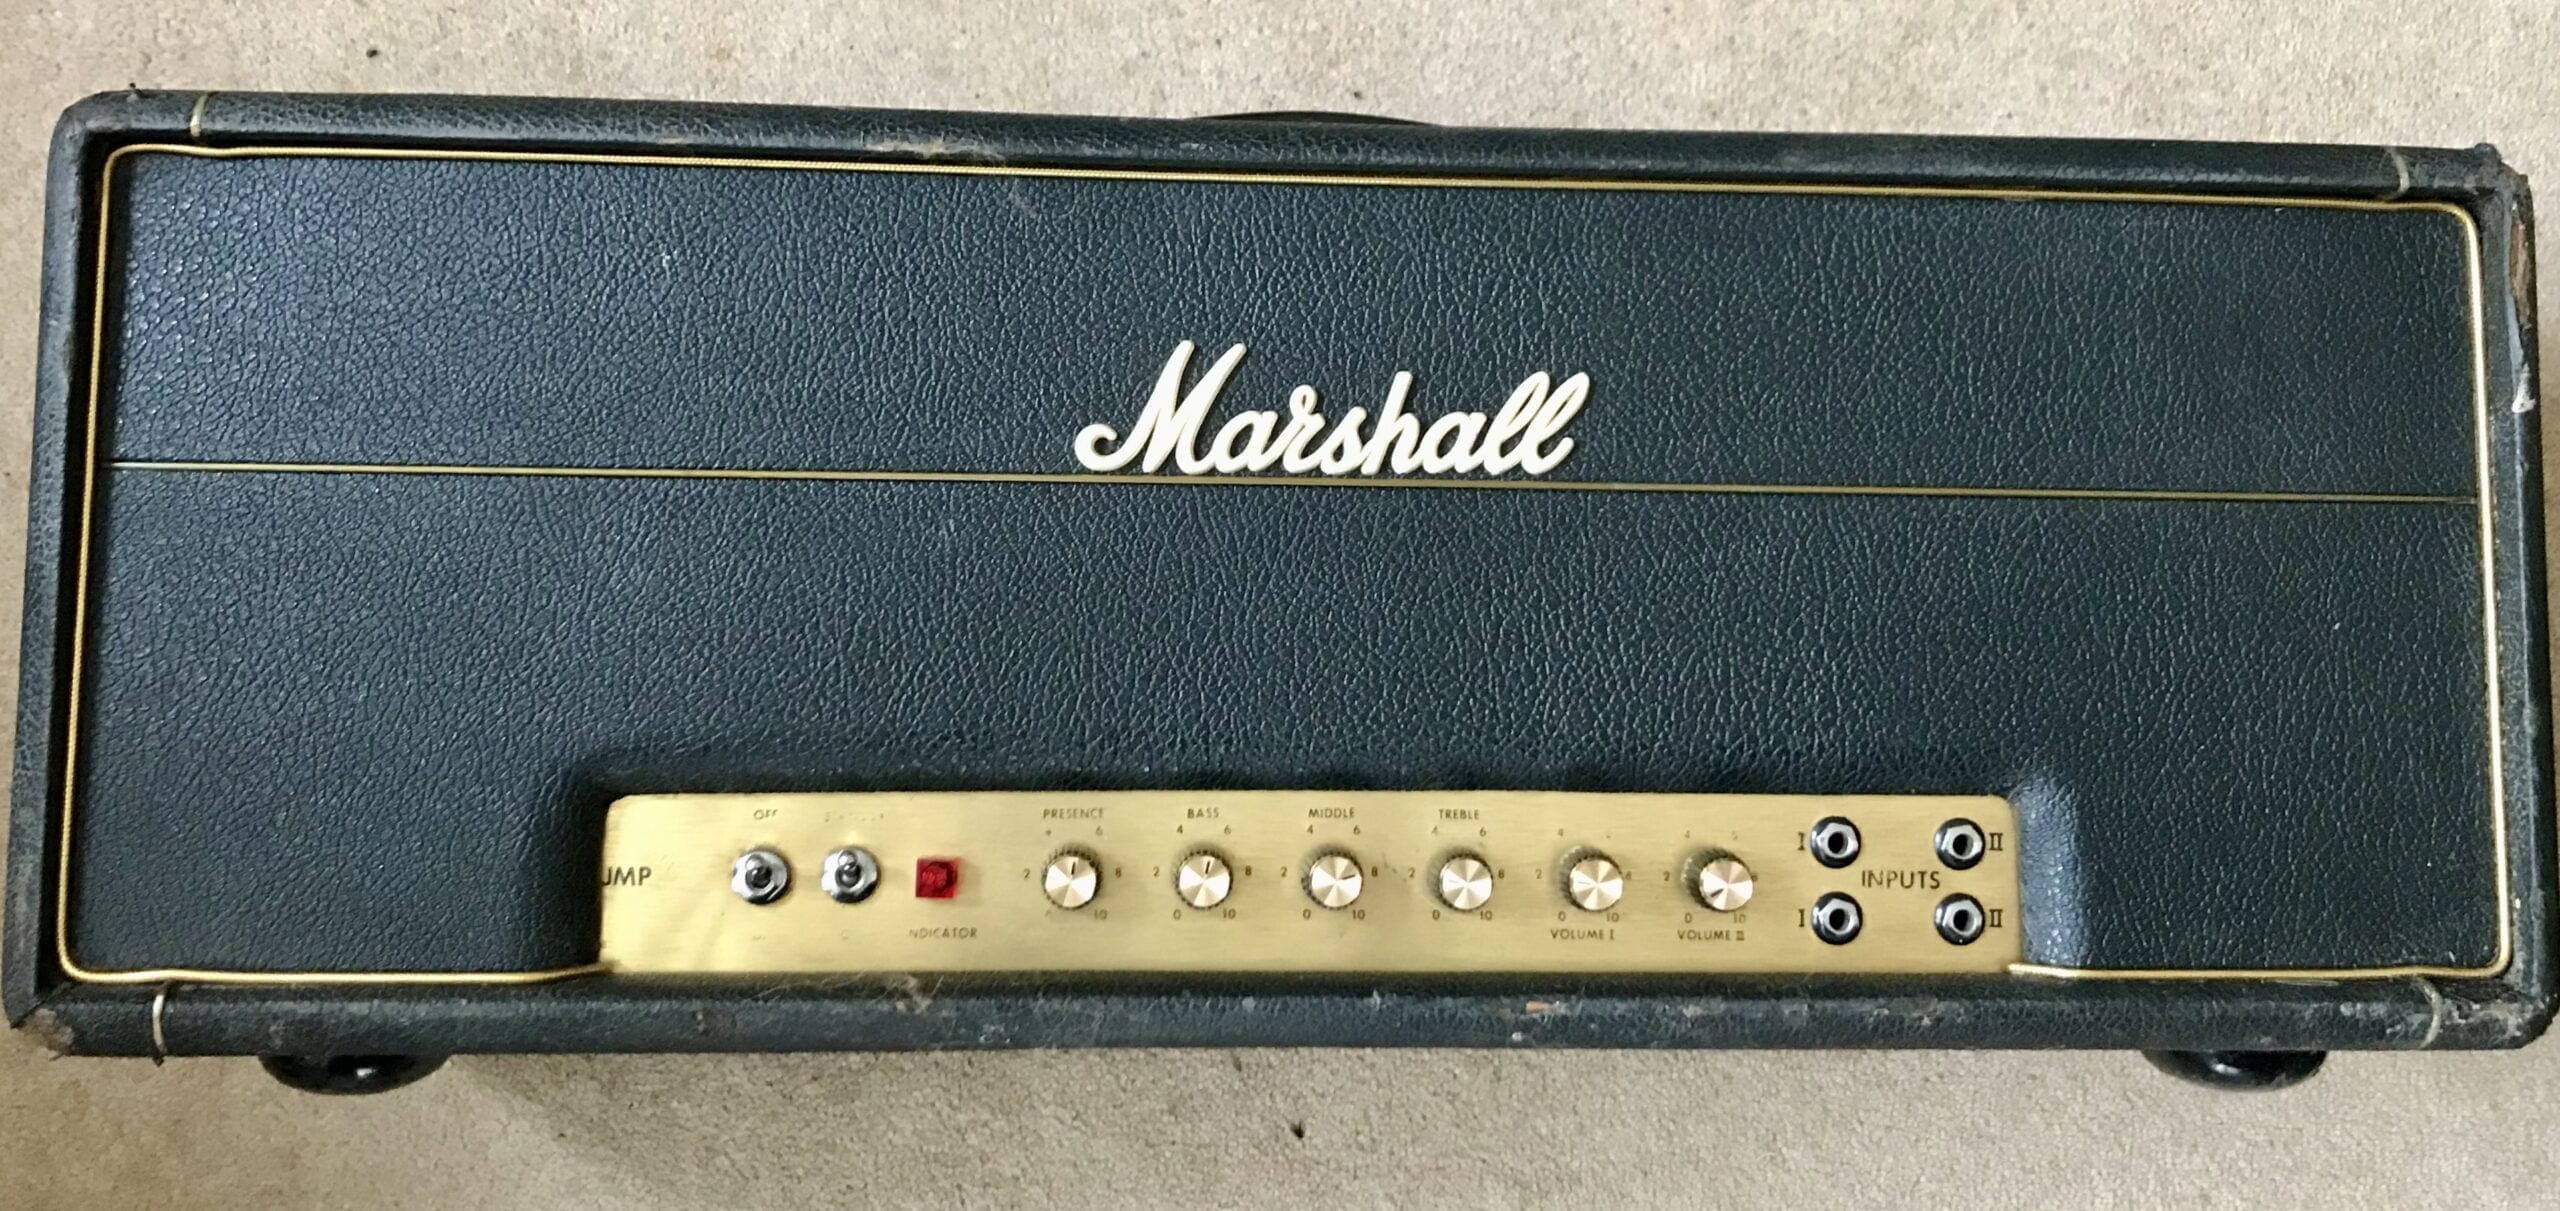
A Marshall JPM 50 arrives in the workshop. This blog covers this Marshall JPM50 Re-Commission.
This Marshall JPM50 Amp is from the classic era of pre-1973 Marshall amps. It is therefore highly desirable when fully operational. The Marshall JTM50 on its last period of production, was re-branded as the Marshall JPM50. The amp went though final test at Marshall on 13th June. 1972.
This is the highly desirable lead model from one of the best periods of Marshall amp production.
Our example is in a very sad looking state . I did not take a picture of the amp as it arrived. I would emabarass the amp. The picture was taken when the amp was finished.
It had not been used in probably decades. So it needs put back into service so that folks can hear just how good the Marshall JMP50 is.
It is a 47 year old piece of electronics but the years and “inventive” repairs over the years turns it into an ornament. Nice to look at but nothing to listen to!
The task is therefore to return the amp to full operation and ensure that it is as safe as possible for use in today’s environment. Don’t forget that this amp was made to the prevailing safety standards of 47 years ago.
General Background
I believe this design was introduced in 1967 as the JTM50 and in the final months of production was called the JPM50. The design being superceded in 1973
Components do fail over time and lack of use also causes failures. Time to change components, in order to make the amplifier function to its specification and to ensure the amp is fully useable and reliable. Only those parts that are impacting safety and /or functionality are changed. The idea is to preserve as much of the originality of this amp . Here are some highlights after inspection :
- The mechanical condition of the chassis is good, although there is a lot of wax which has flowed from the previous failed mains transformer on the chassis. This has no impact on the performance and is still present. It would require an amp total rebuild on half of the chassis which would be prohibitively expensive and would ruin the originality.
The front panel has sustained mechanical shock in the past and is twisted with the front panel split away from the main chassis. This was straightened and the front panel re-glued in place. - Next task -de-case and examined as it is too risky to switch on. Thoughtsof smoke and me going up in a blue flash come to mind.
- The mains transformer had been replaced. The HT fuse-holder was broken. There is a lot of wax that has melted out of the previous mains transformer and partially covered the inner right hand side of the chassis. It is an insulator and so was left. It adds to the character of the amp.
It is likely that a previous set of output valves were not biased correctly and there was excessive load on the transformer. Another possible cause of mains transformer failure in these amps is using a power soak. PLEASE USE A POWER SOAK ON A VINTAGE MARSHALL AMPS. IF YOU WISH TO DESTROY THE MAINS TRANSFORMER - A mains indicator lamp was missing and the hole in the chassis remained.
- “Pignose” Bulgin mains connectors not meet Health and Safety standards for today. We will replace it with a modern compliant IEC-7 type
- OLD EL34 output valves are totally mis-matched with one much more worn that the other. Time for a nice new shiny Tung Sol EL34B matched pair.
- Output valves bias circuit is always an area of concern in these amps because the electrolytic capacitors tend to fail. We replace them as the partly worn ones will generate hum from the amp.
- Pots are tested when the amp is up and running. They are noisy and are cleaned. Our aim is to rescue the original pots if at all possible again to preserve originality. The volume control pots had been replaced at some point with period incorrect plastic shafted pots. They are totally worn out and causing the amp volume to cut out. Not easy to find metal D shafted pots these days, but they are still made. we fit ice new original types as originally fitted to the amp
- The three Brimar ECC83 pre-amp valves look ok on the tester. However, the electrodes are loose inside which is making them extremely microphonic to the point of the amp not being useable. We will replace them.
- We see that the two 0.22NF capacitors are not originally fitted across the transformer. While they are on the schematic, Marshall stopped fitting these capacitors in later production. They were there to stop “speaker thump” when switching the standby switch.While it would require, the turret board to be modified, it was felt that these capacitors are not necessary just as Marshall concluded when they stopped fitting them.
- The case itself is extremely dirty with grime and nicotine over its 47 years.The case was cleaned (enough to preserve the patina) and we glue the tags and rips in the Tolex back in place in order to stabilise the case from future damage.
- The chassis front panel was twisted and parting from the main chassis. We straighten it and glue the facia back in place
- Knobs are missing from the front panel. We source original vintage Marshall knobs to fit “D” shafted pots/ Good ones with the brass bushes inside. They do not fall off!
Electronics Summary
- We PAT test the amp – a total fail. The amp is dangerous
- The HT power supply wiring is wrongly connected and the chassis is not earthed. We get the schematic out re-wire and do a solid earth for the chassis.
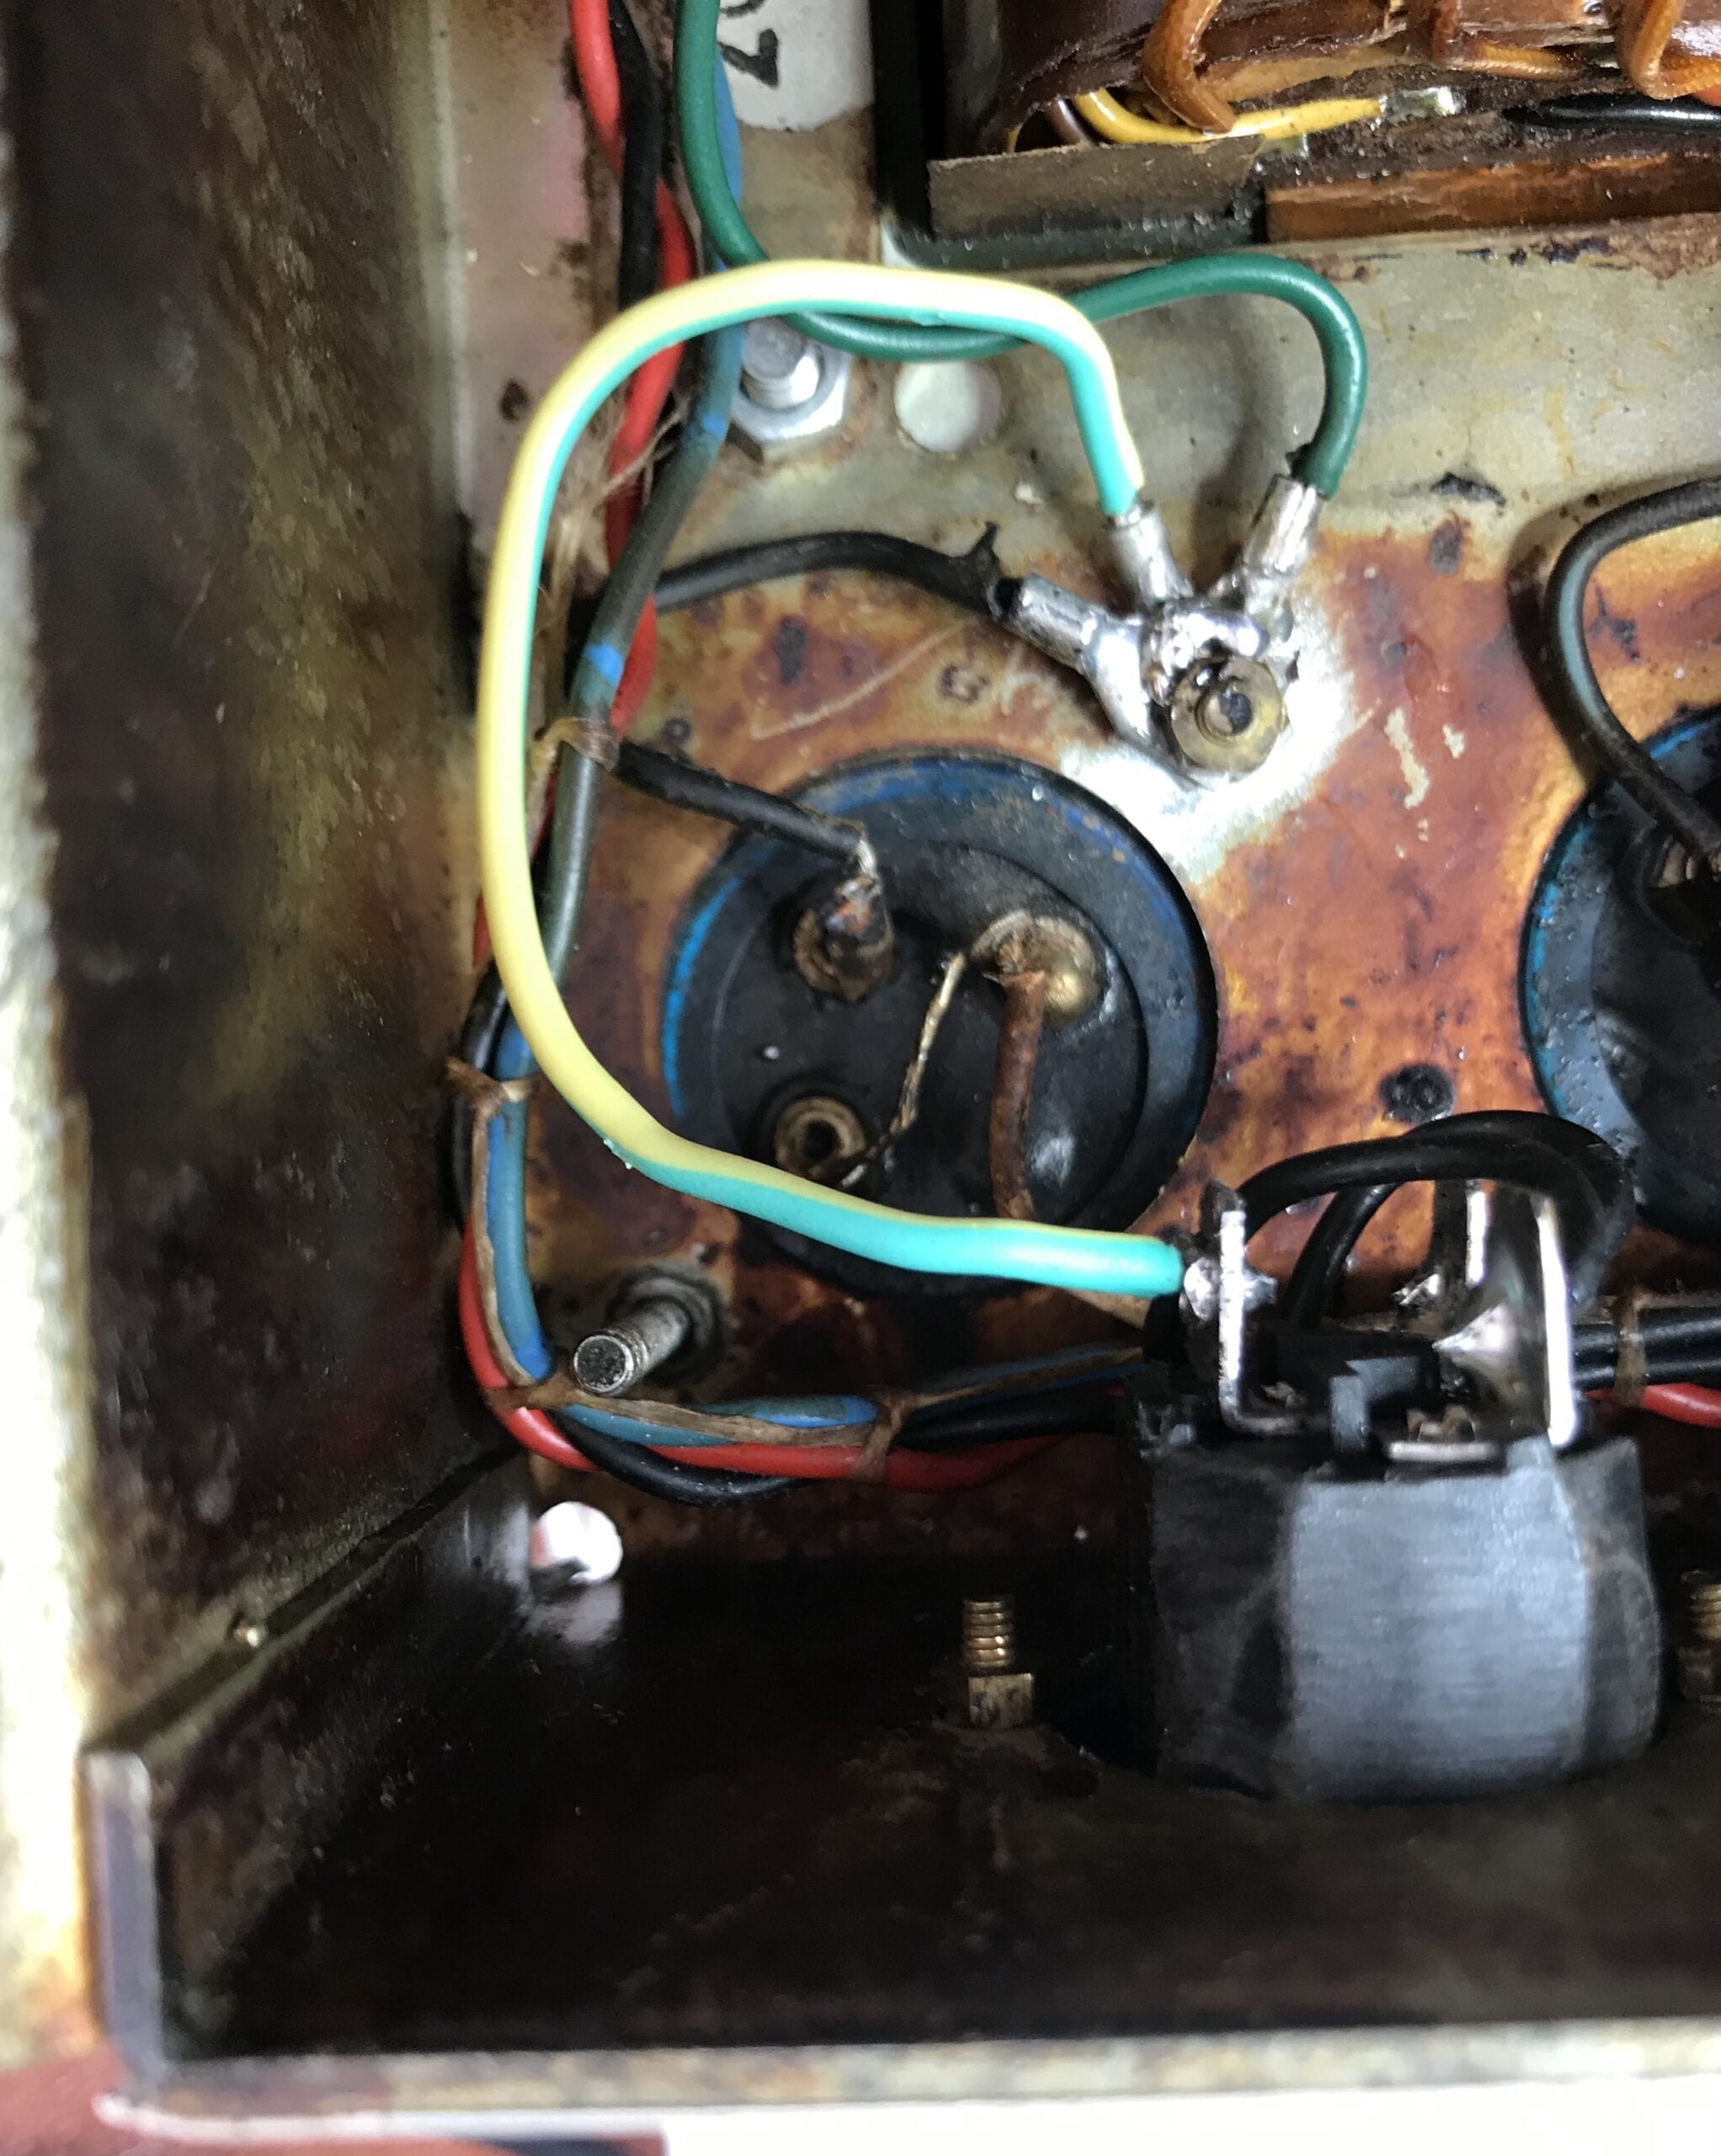
Corrected Power Supply Wiring tidied up, good earth added
- We tidy up and dress the spaghetti wiring from the new transformer fit
- Next job- replace the the shattered HT fuse holder with a new one from the same manufacturer as originally fitted to the amp. Manufacturer is Bulgin
- We replace the out of date “pignose” Mains connector with a modern IEC-7 mains socket.
- The two 0.22NF capacitors on the schematic are not in this amp across the transformer. While they are on the schematic, Marshall stopped fitting these capacitors in later production. They were there to stop “speaker thump” when switching the standby switch.We think that these capacitors are not necessary just as Marshall concludes..
- A decent 3 metre long IEC 7 type mains lead is now supplied with the amp. . Please always use a 3 amp fuse in the plug as it is there to protect you and more importantly this classic amp !.
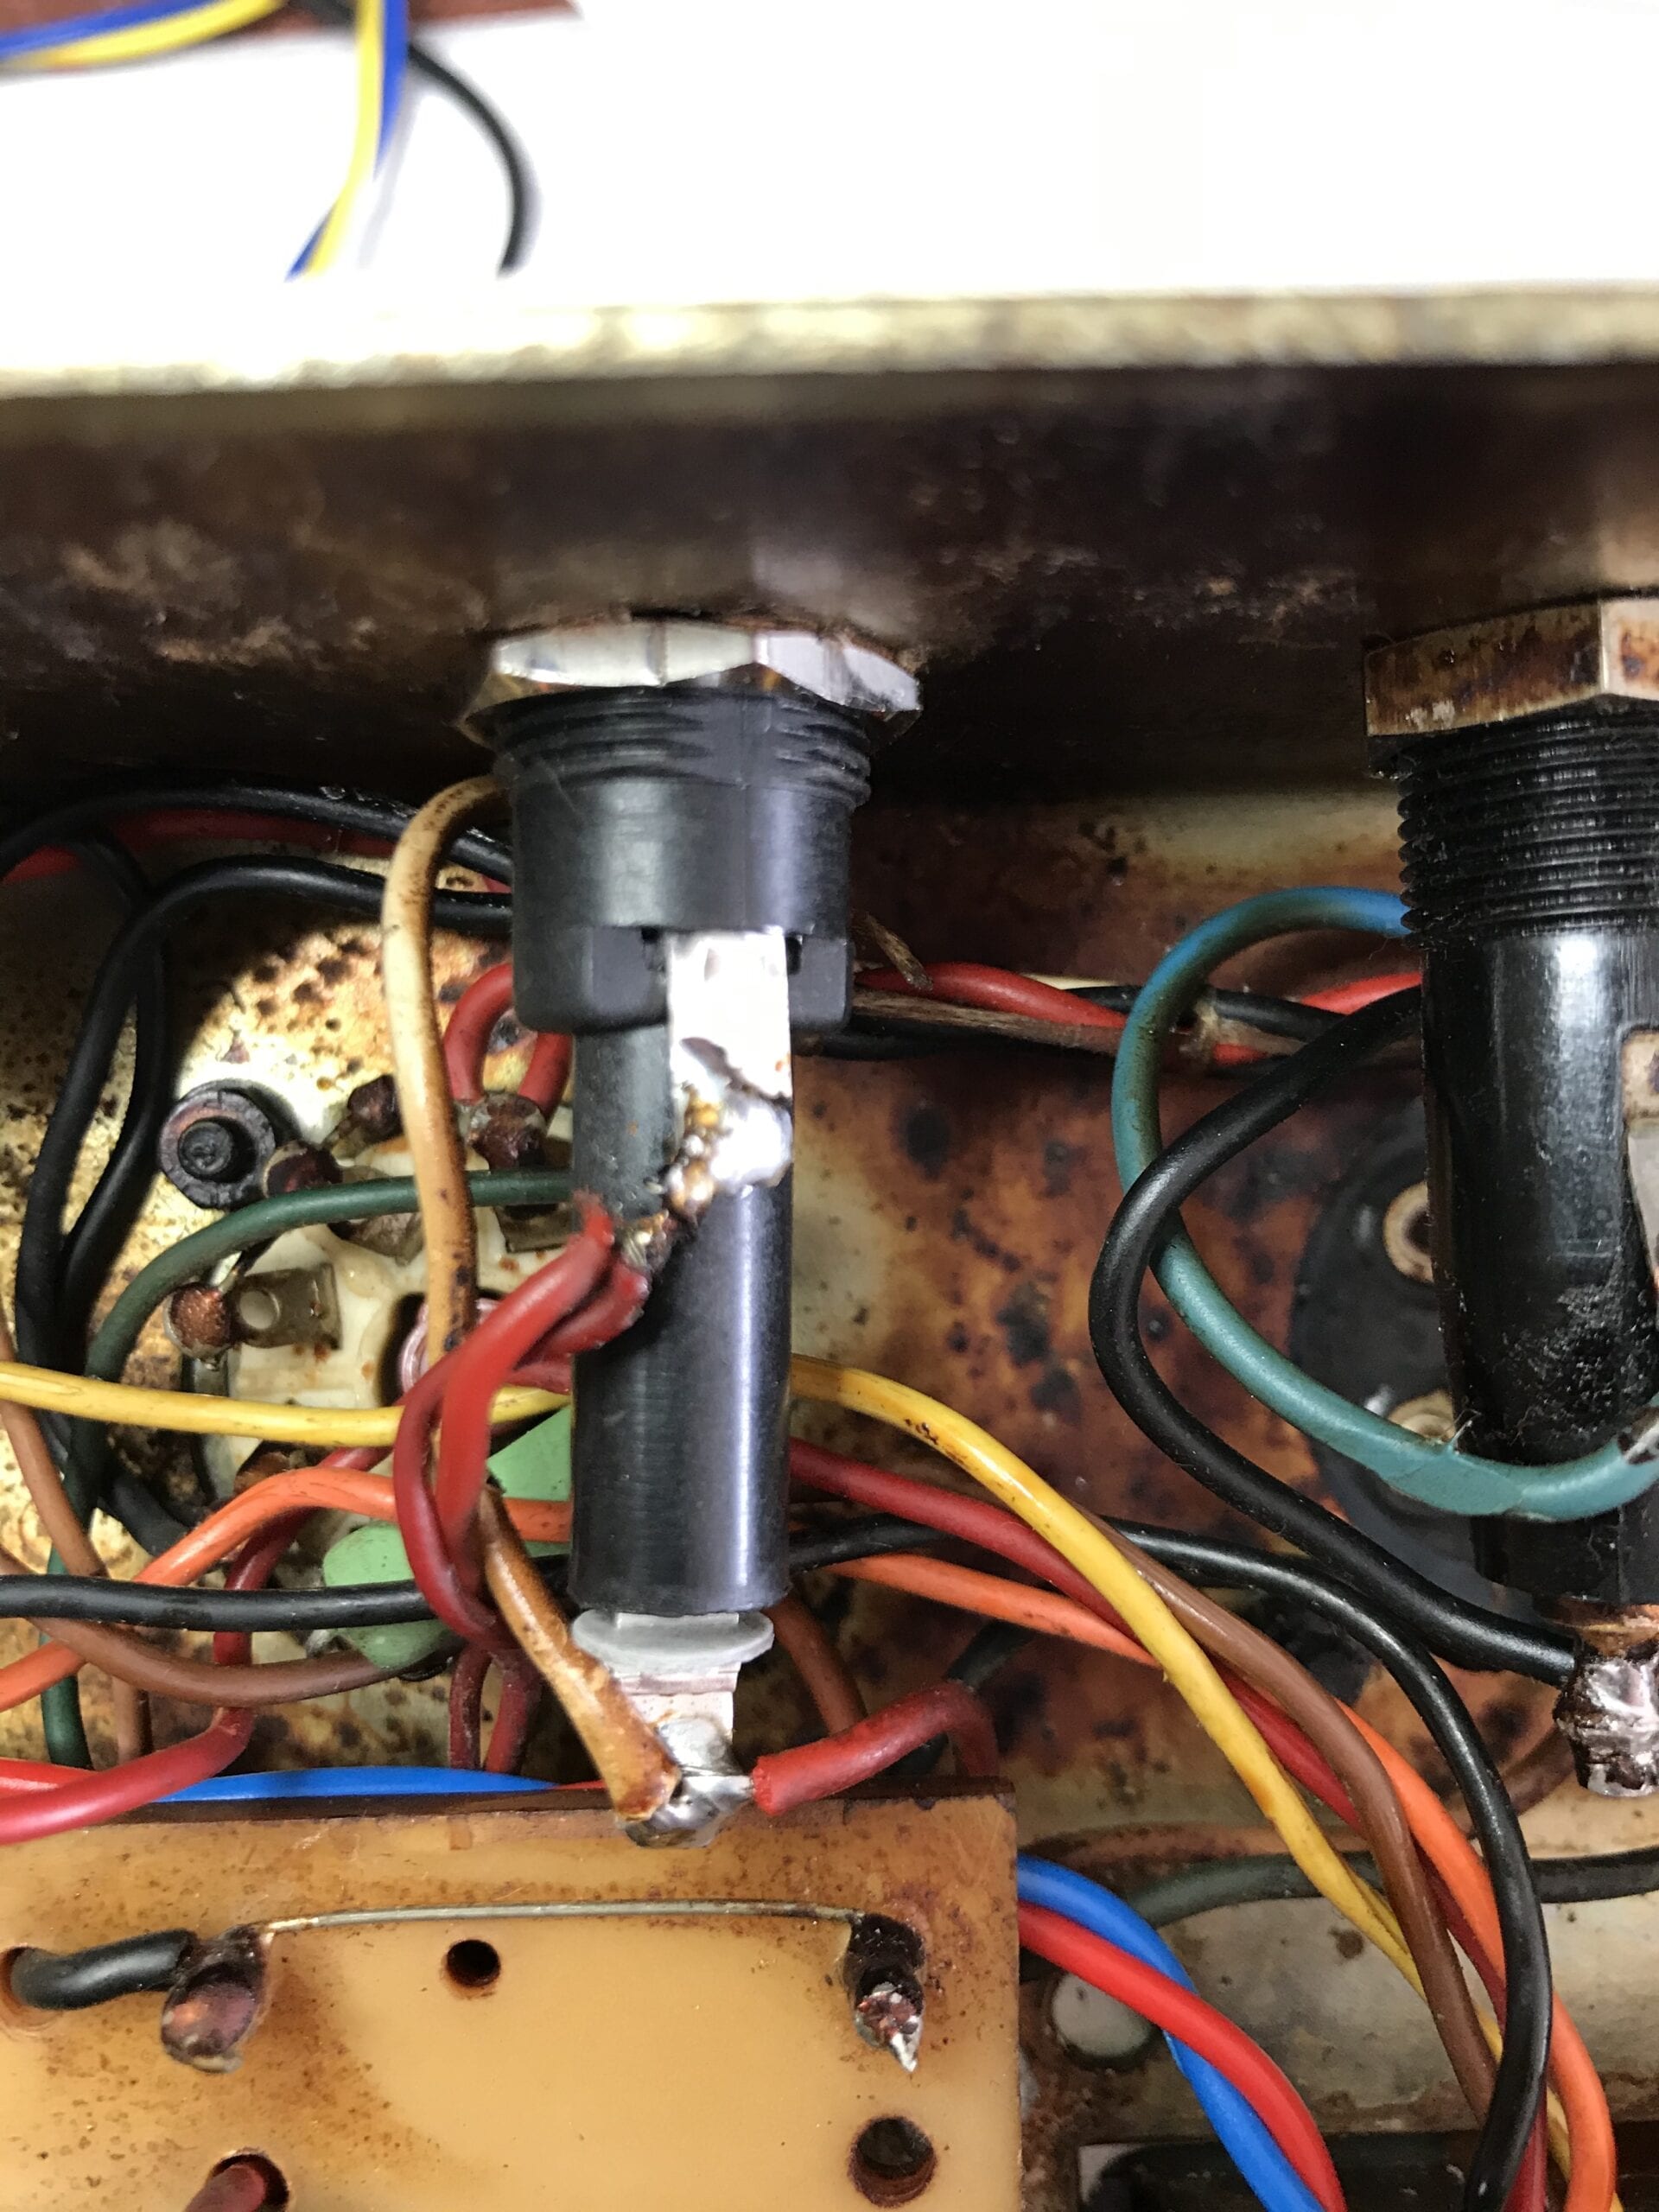
Replacement Bulgin fuseholder fitted
- Time to do another PAT and the earth loop test now passes. Hurrah! it is now becoming safe
- A gaping hole on the front plate does not look goosd so in pops a nice new indicator lamp which is powered from the heater circuit
- These early amps have the screen volts on the output valves directly connected to the anode volts. The problem with this arrangement is that, if an output valve becomes faulty and short circuits, large current passes through the mains transformer till either the diode bridge, the valves or the mains transformer is damaged. The HT fuse will blow but the damage happens during the time the fuse takes to blow
So time to add in 1Kohm 5 watt resistors into the screens of the EL34’s. This has no sonic effect whatsoever, but builds in protection for the diode bridge, the mains transformer and the valves themselves when there is an EL34 output valve failure. Marshall incorporated this change in the mid 1970’s. - Now to replace EL34 output valve bias capacitors . These ensure minimum hum and are a common cause of failure in these early Marshall amps. Sudden failure can cause EL34 under-biasing and the output valves are wrecked, and the output transformer can be burned out if the capacitors fail. The picture below shows the brand new vintage screen resistors (green coloured Vishay retro type) and the bias caps changed
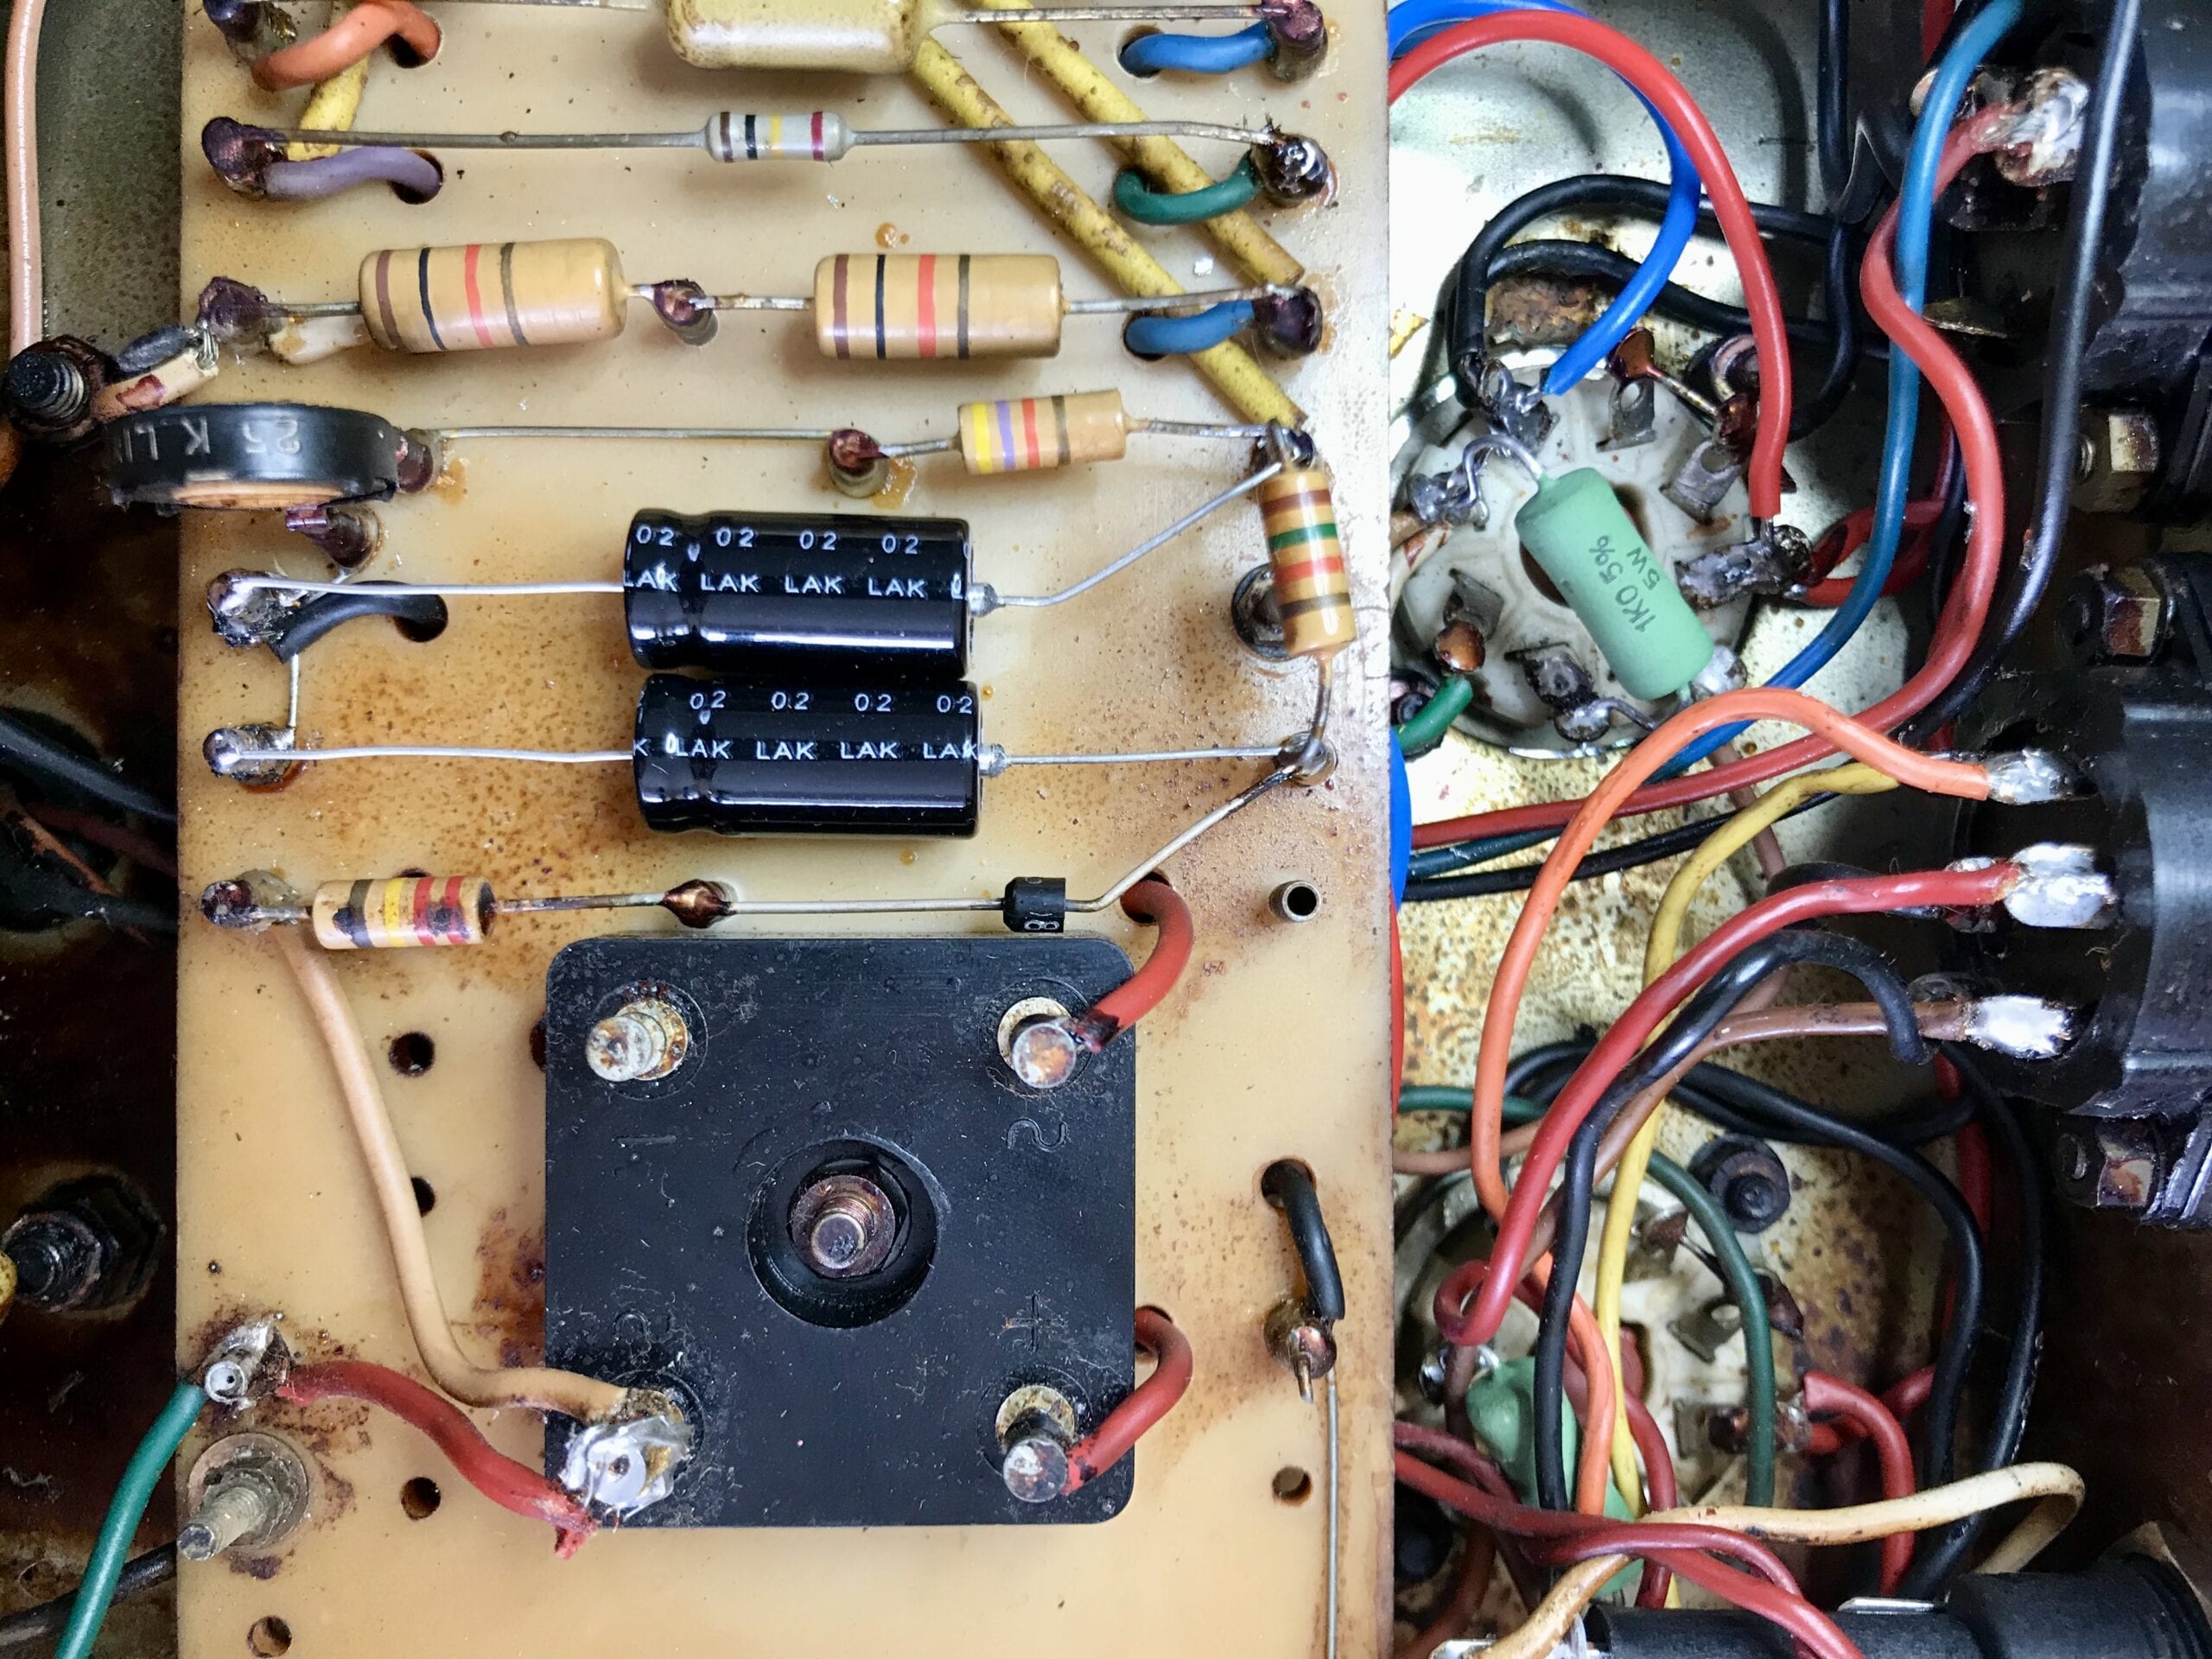
Replaced Bias Circuit Electrolytic Capacitors
Green screen resistors on the EL34 valve bases now all present and correct
- The amp power supply, pre-amp output sections are re-commissioned in stages to minimize the risk of damage. The power supply caps and choke are in good condition and is not unusual to see these components lasting 50 years or more. Marshall use quality components.
- A Tung Sol EL34B matched pair are fitted. These are, in our opinion, the best sounding output valves Marshall themselves use these valves due their tone and durability. They are set up and biased around 70% in order to bring out the Marshall tone which makes these amps so desirable.
- It was noted that while the Brimar ECC83 are operational they are totally microphonic and non-useable. we swap them for Tung Sol 12AX7’s. A balanced one is fitted to the phase splitter to ensure even drive to the two EL34B output valves. This results in optimal tone and even wear on the output valves.
- On power up and testing of the amp, we see that the volume controls are extremely worn. The old ones are modern lower cost ones with plastic shafts. The correct ones should have D shaped shafts made of metal. The original D-shaft metal shafted types are still made in Wales and we fit these. Marshall no longer supply metal D shafted pots.
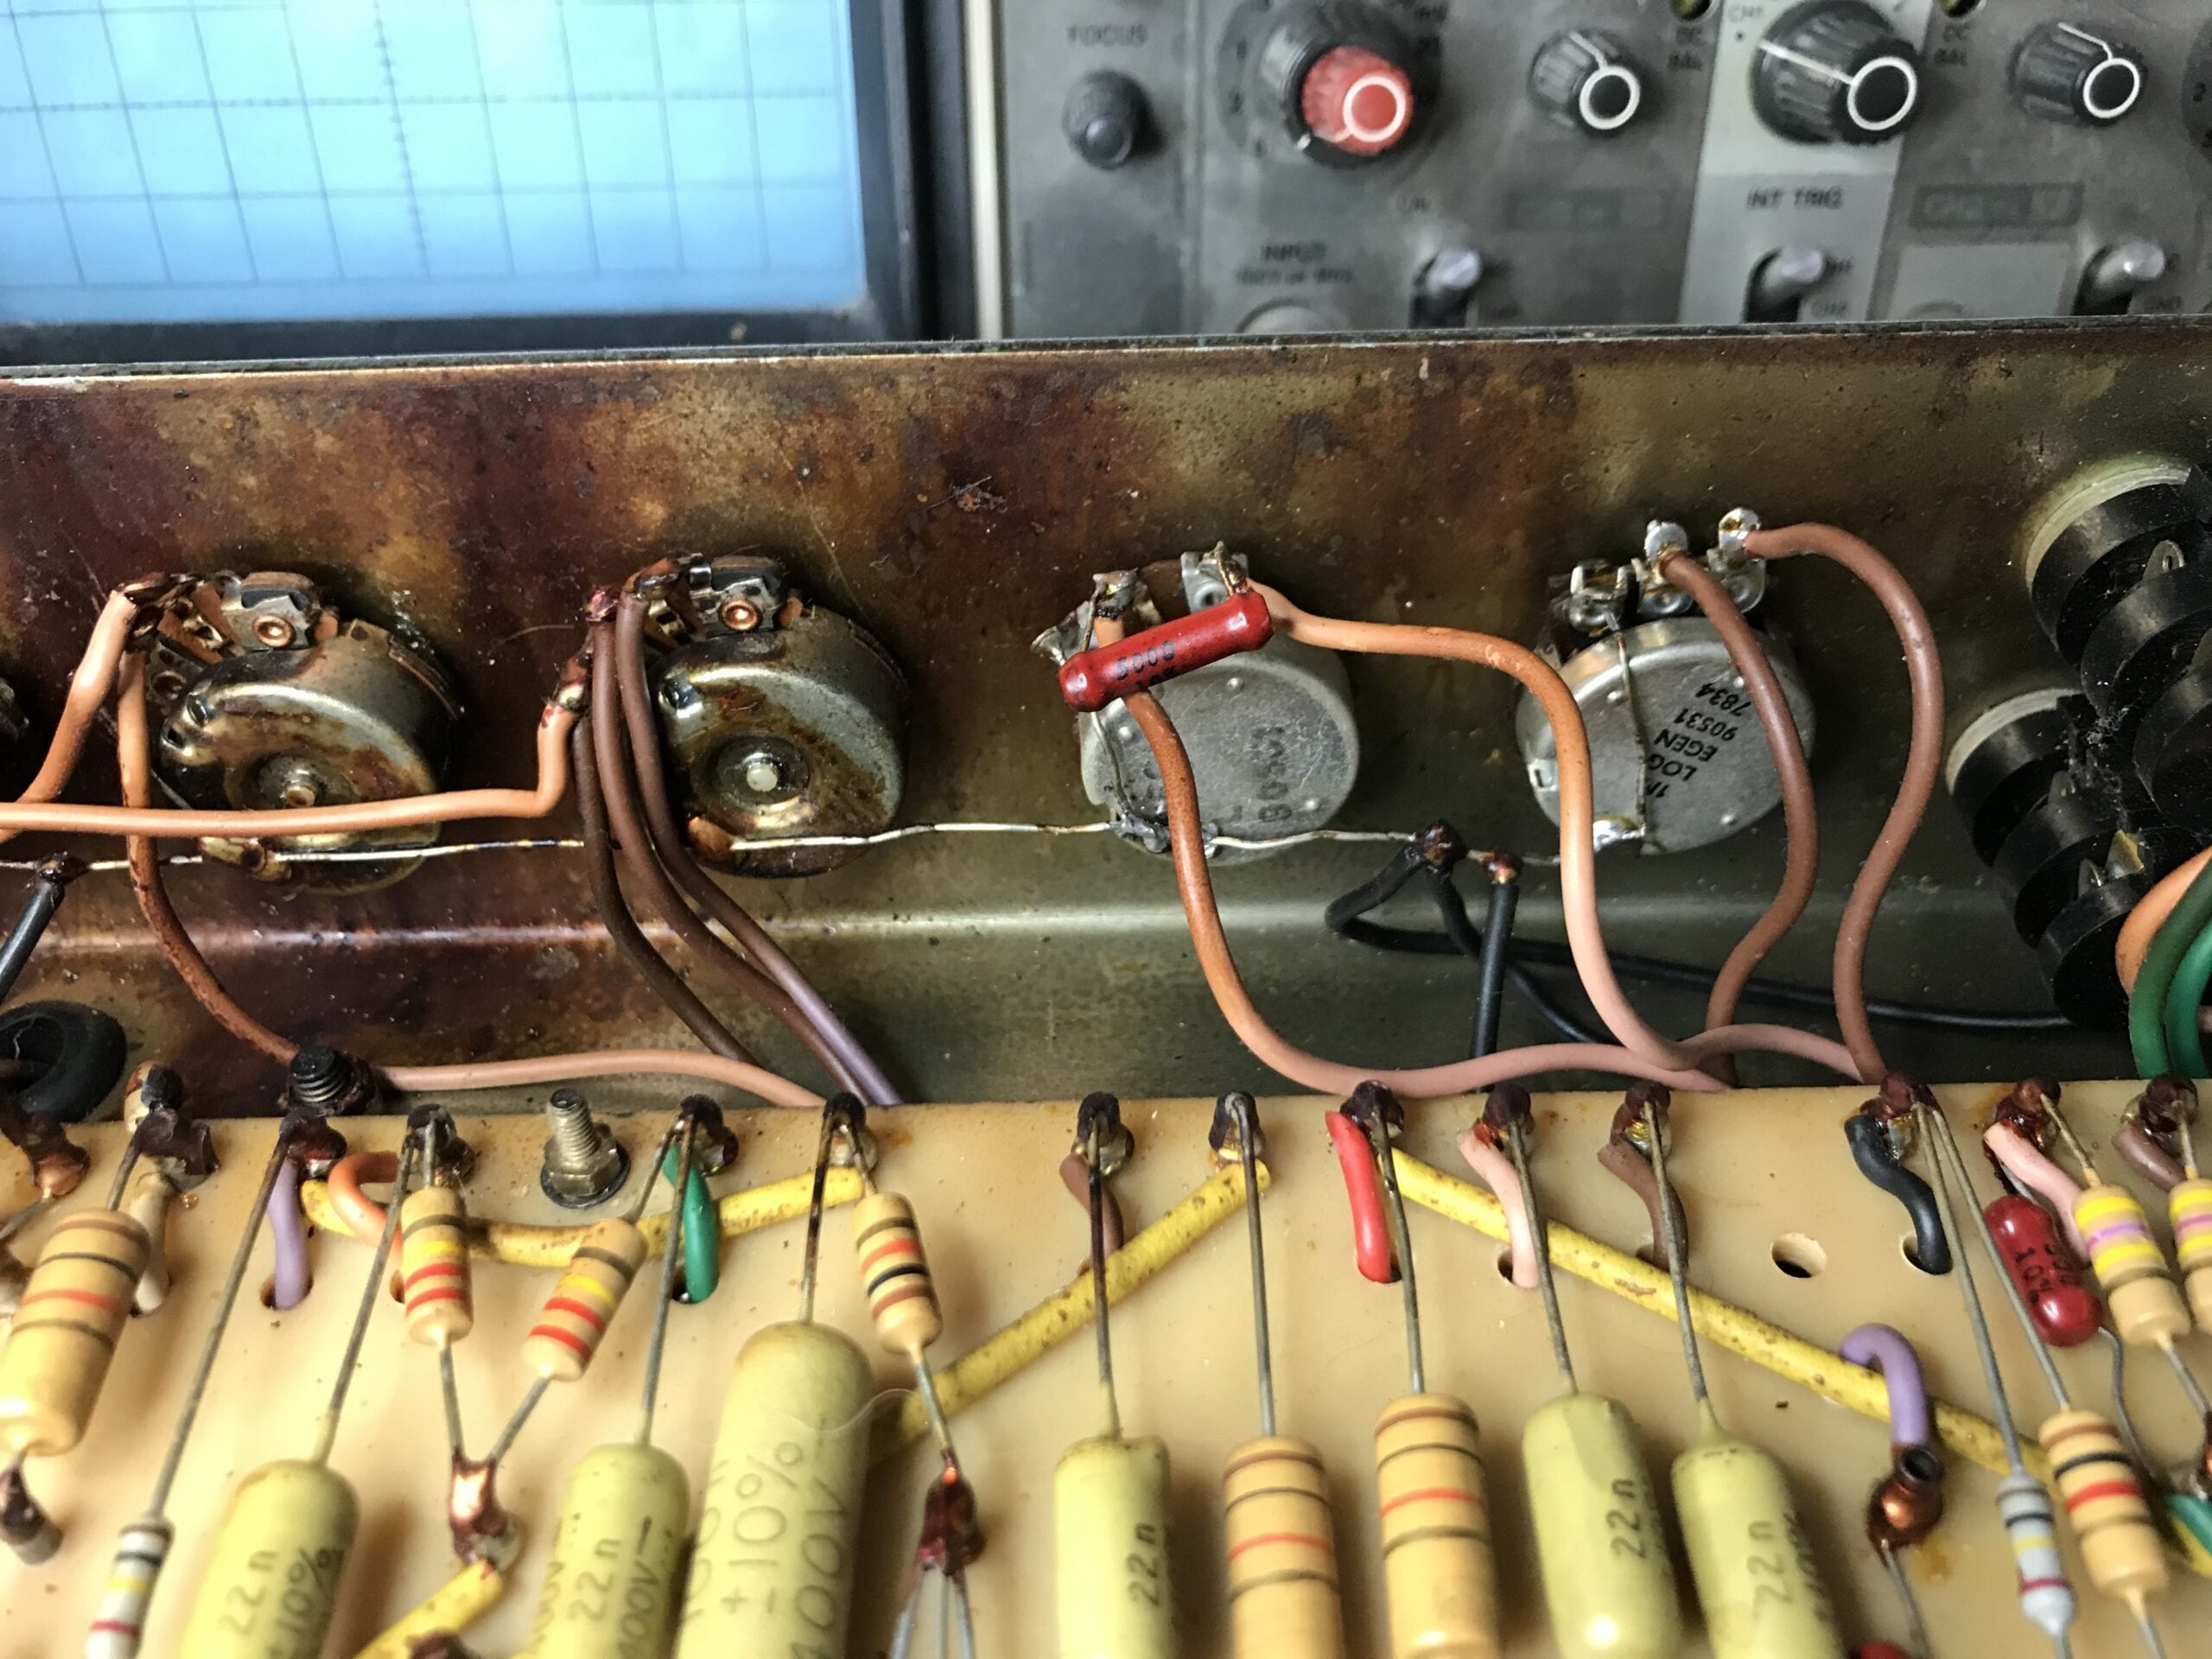
Amp is fitted with two volume controls of a different type to the originals on the left of the picture
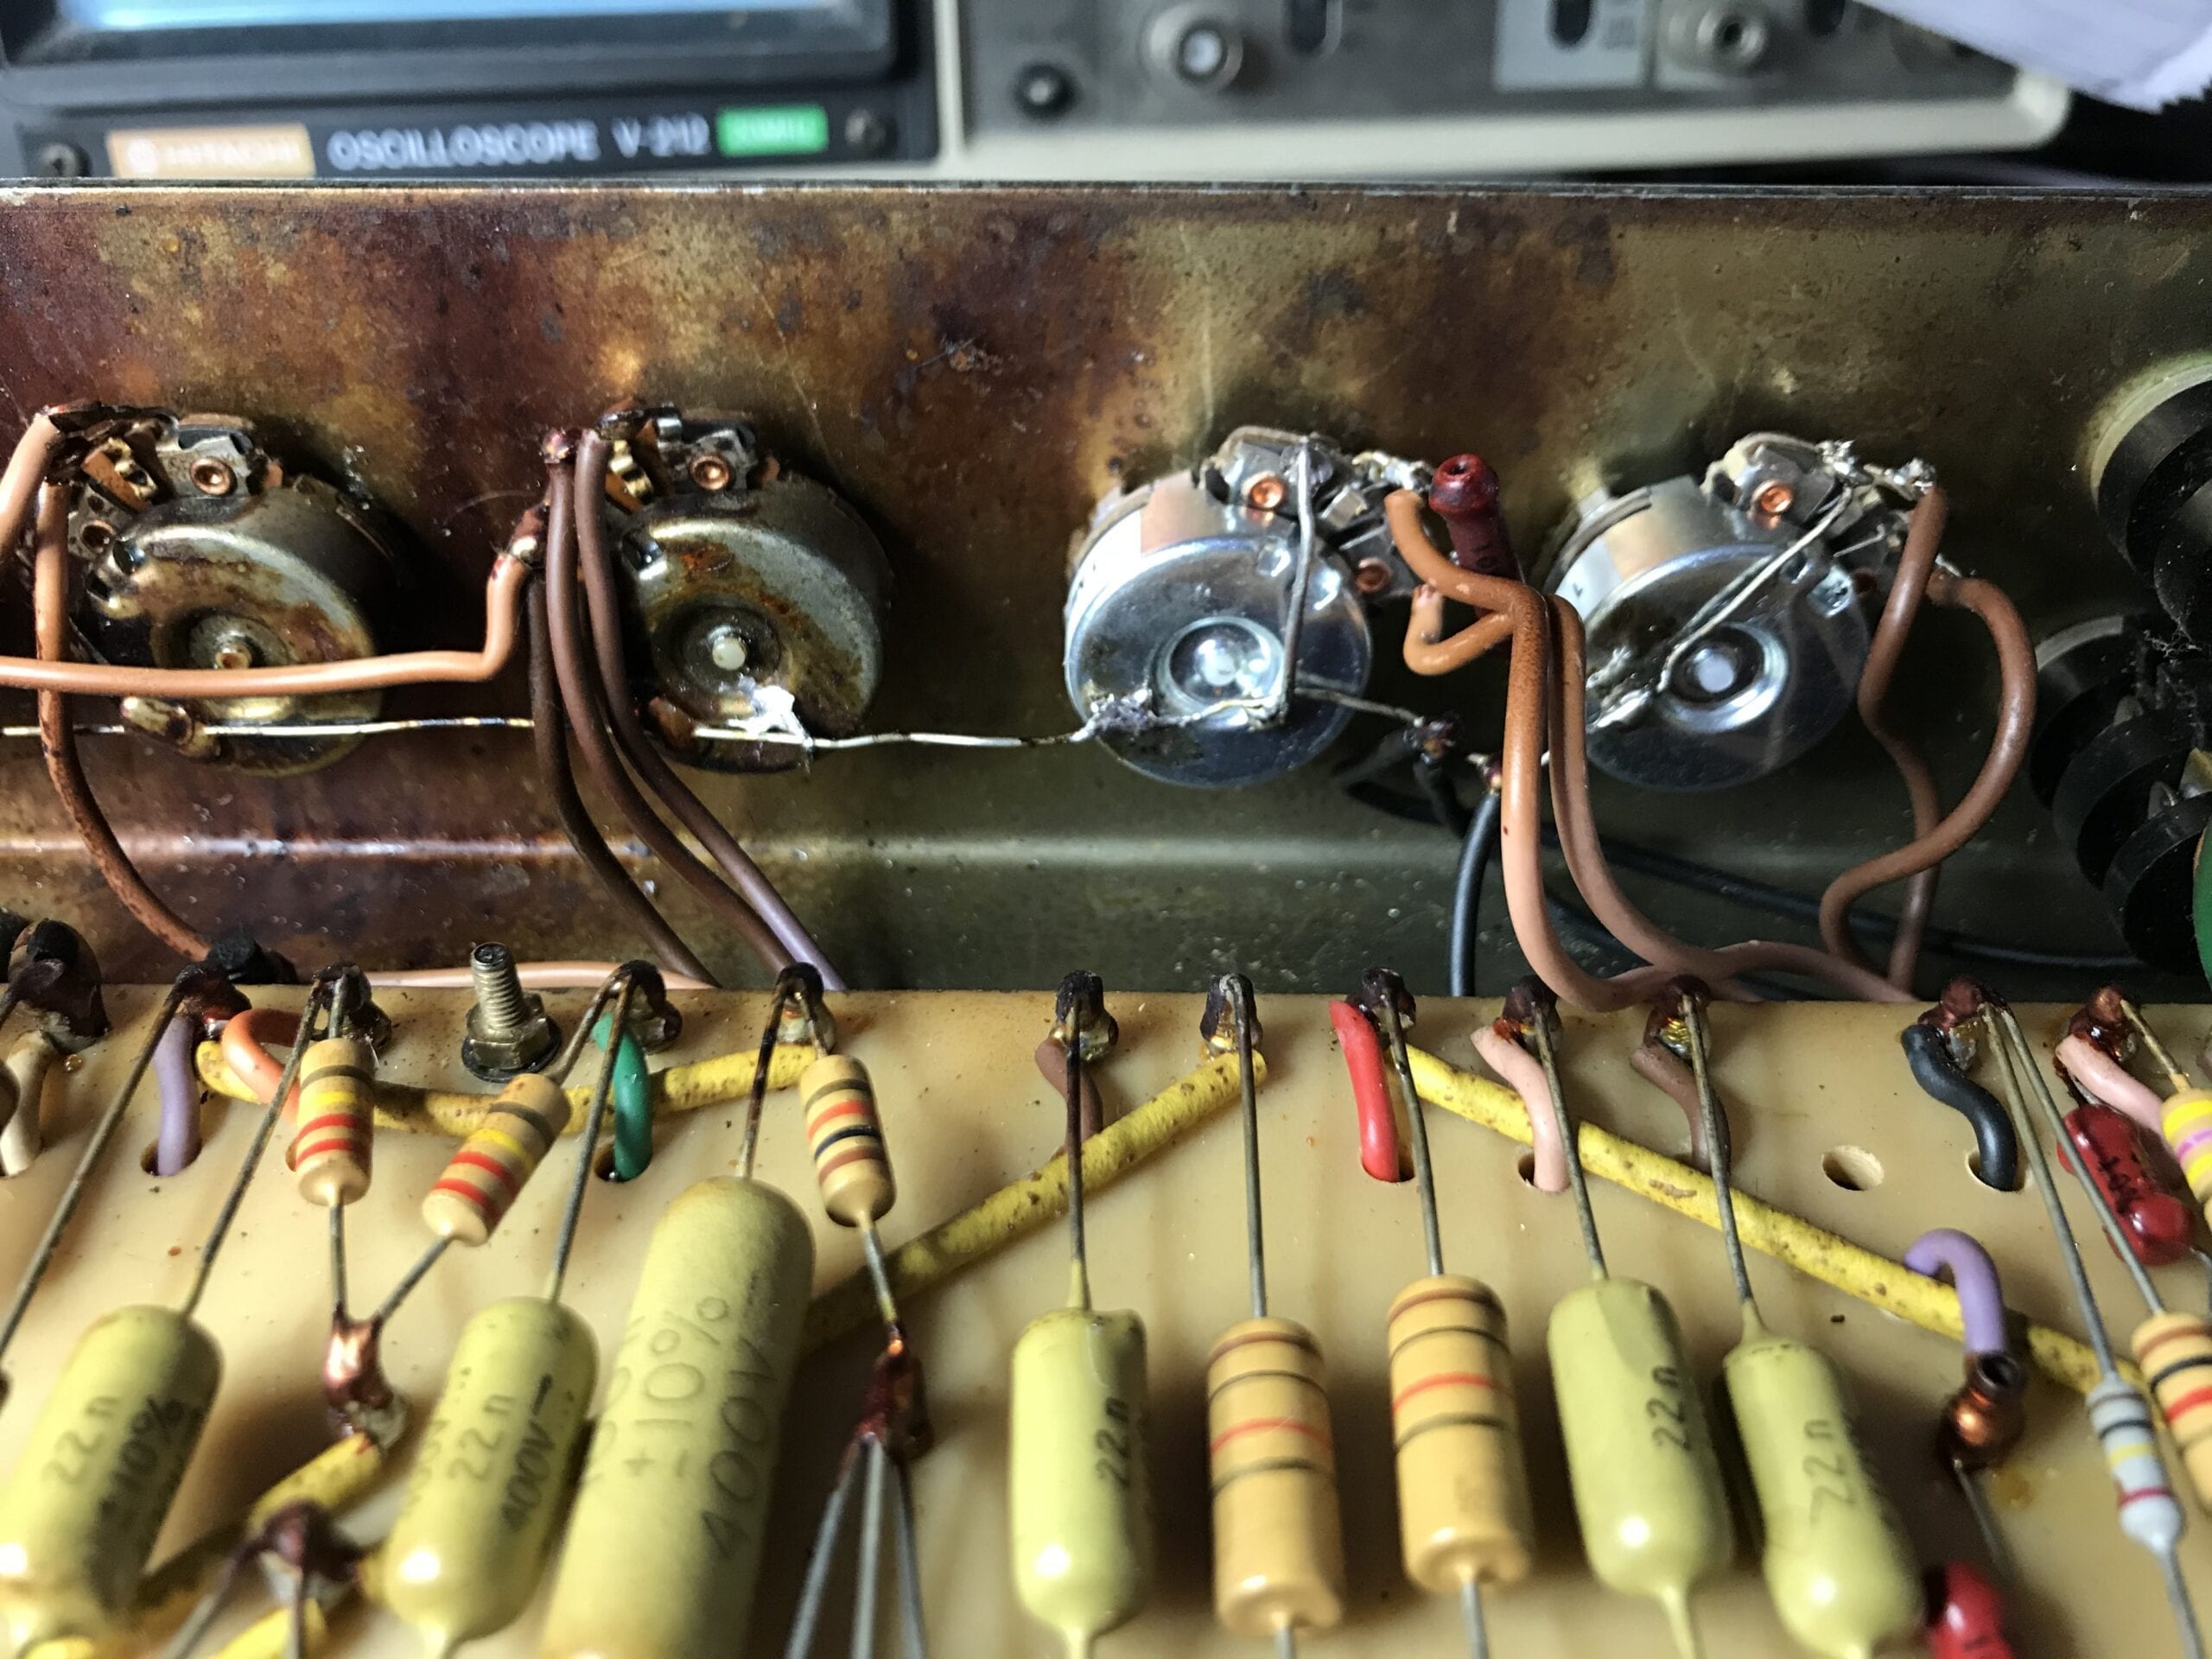
Replacement Original type volume control pots
- A nice touch is to fit quality period correct new knobs with internal brass bushes, and grub screws (modern Marshall knobs are push on to splined pots)
- Now soak tested and then re-cased in its gently restored cabinet. During the soak test, we leave the amp running for a few hours and then switch off and leave to cool and then repeat the process. When the amp starts up from cold, it is extremely noisy with crackling which then calms down after 15 minutes. Intermittent faults such as this can be frustratingly hard to find but we find the signal caps on V1 were leaky until they warmed up..
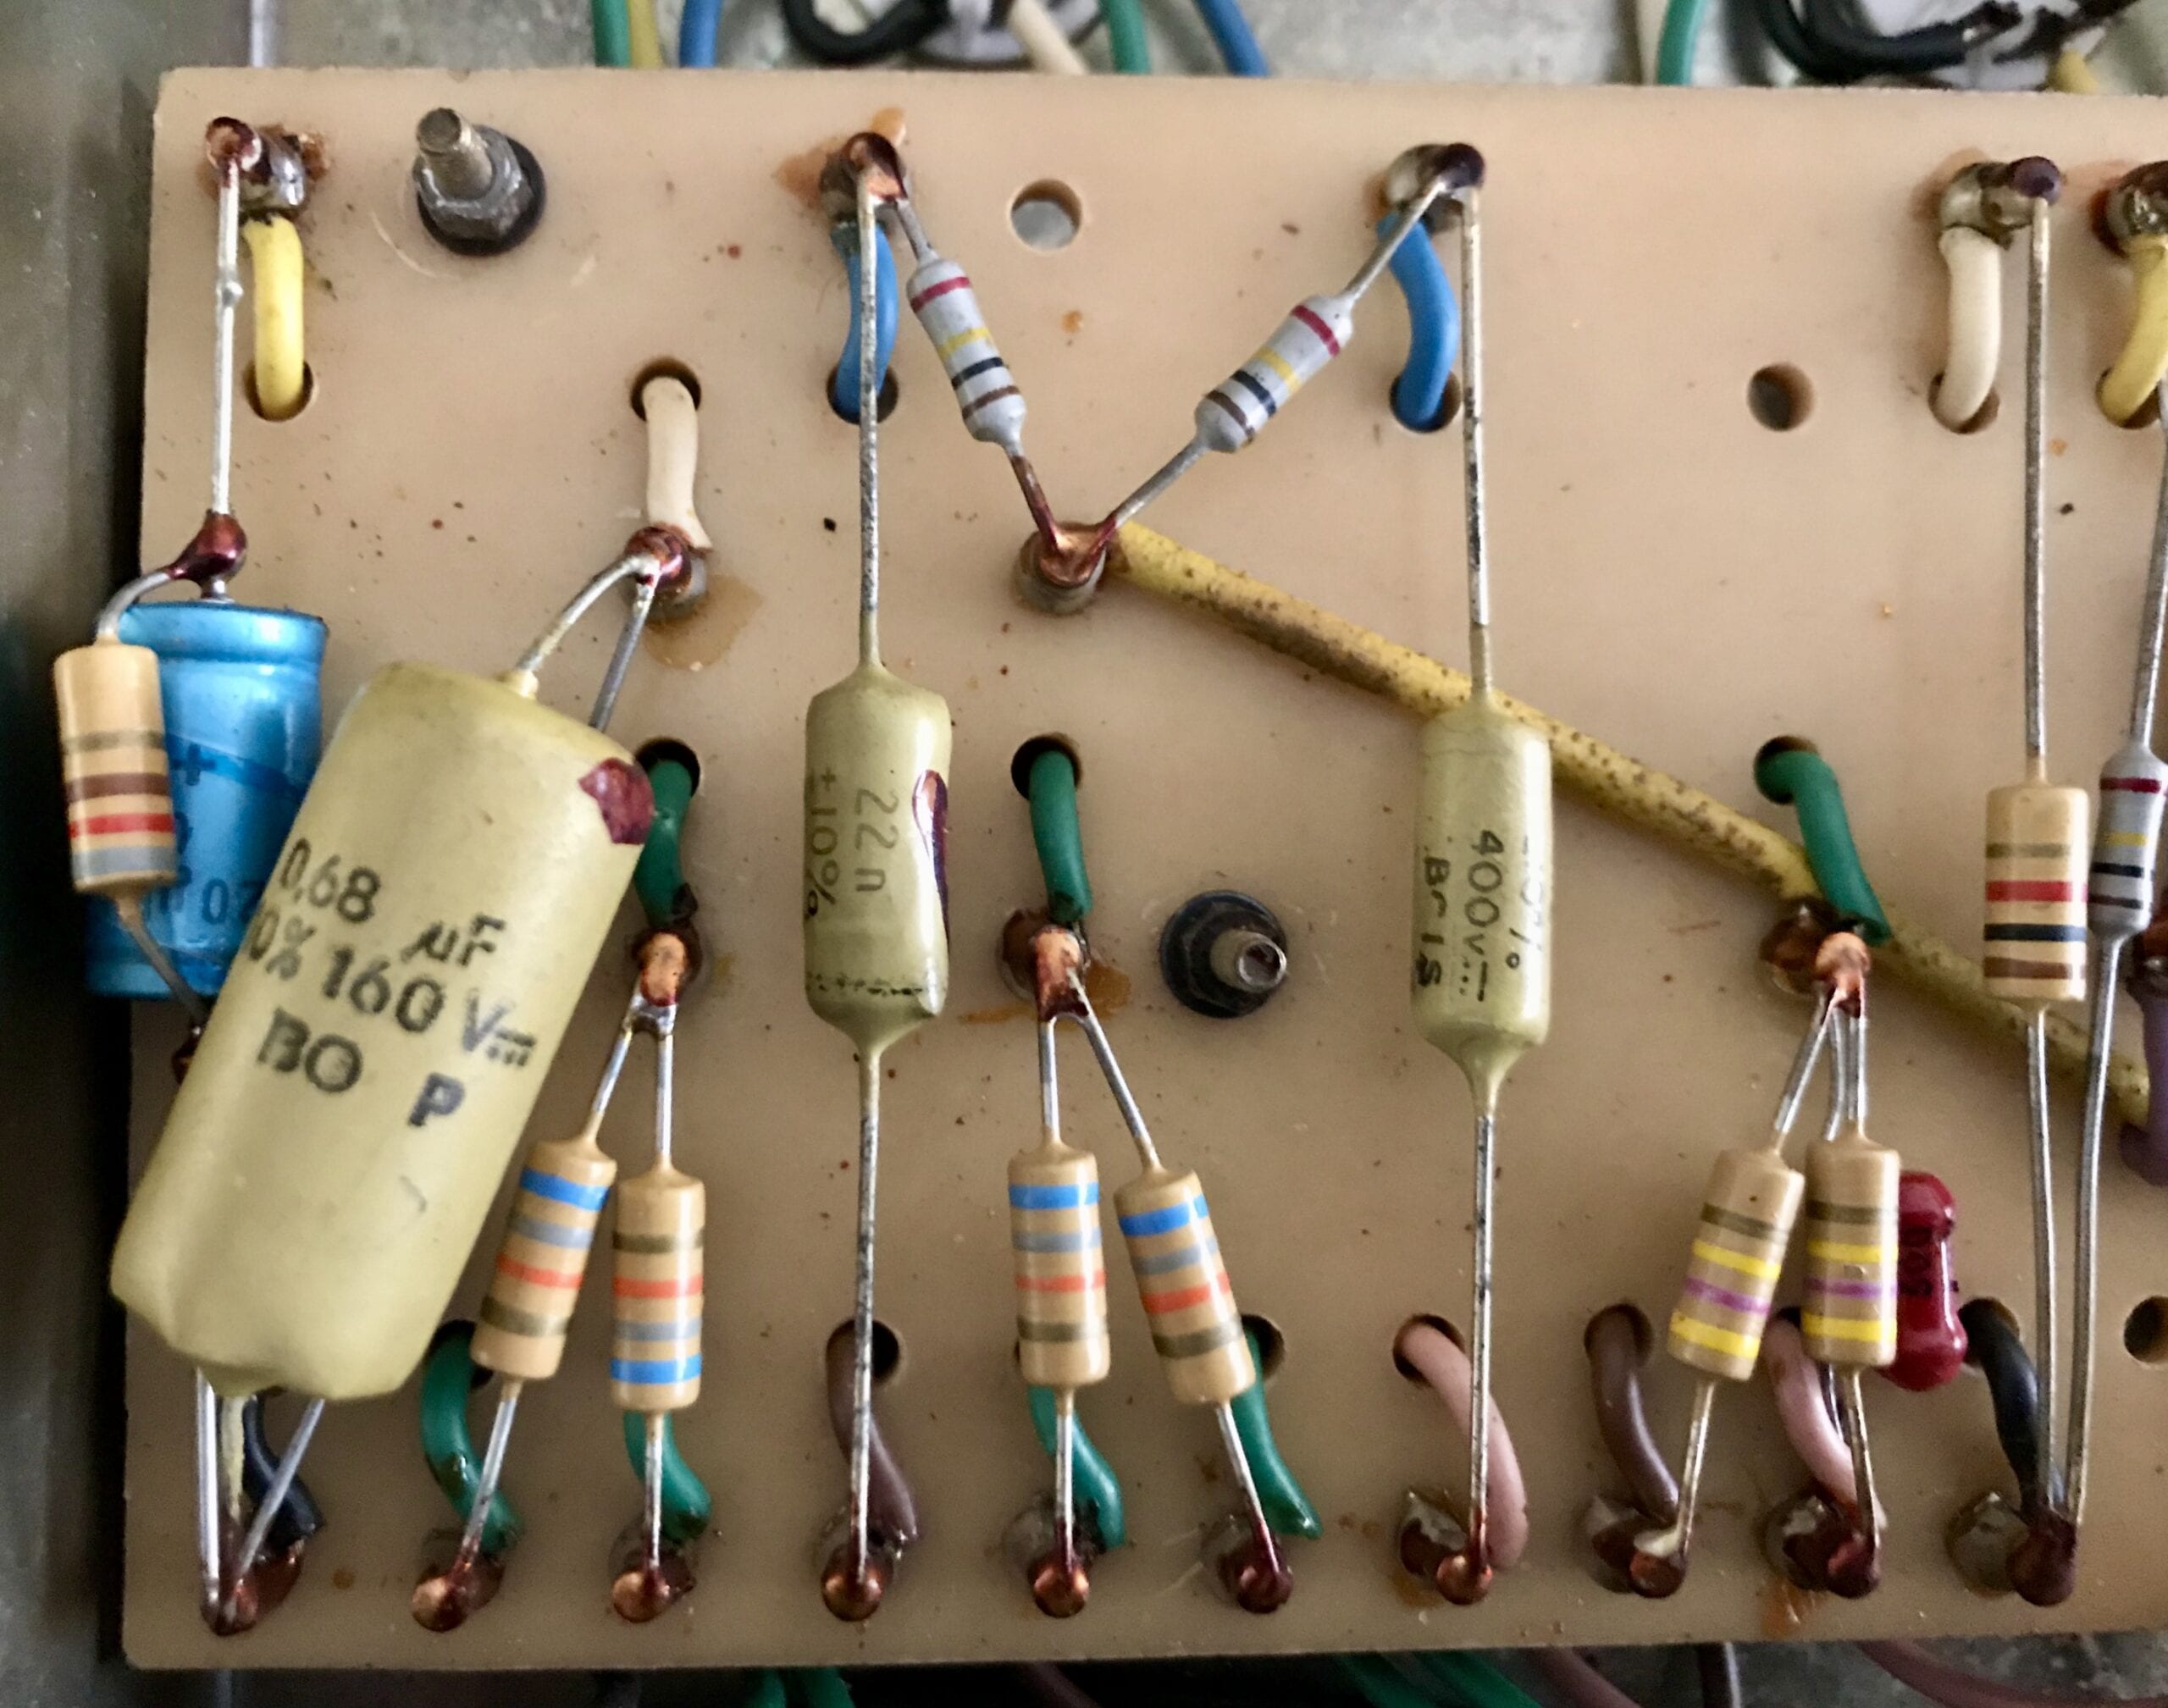
But there is still noisiness at power up from cold. It is a lot better though, The 1 watt 100K anode resistor on V2 anode becomes noisy on cold start up. Out it comes, and nice new one goes in,
Next step is to re-assembe using new mounting bolts as the originals are very worn and the rear panel has its missing fitting screws replaced.
This Marshall JPM50 is now a fully functional and and ready to let its next audience hear these fantastic tones
In our opinion the best sounding valves in this amp are Tung Sol and we have a kit of valves for this amp
